 CastGhost
Hosts don't expect a studio. They expect to hear you clearly, to see you if the show is on video, and not to lose you halfway through. You can do all three with a modest setup, and most of it comes down to plugging things in rather than buying more.
This is the setup I use for every podcast I guest on, and why each piece is there.
The short version
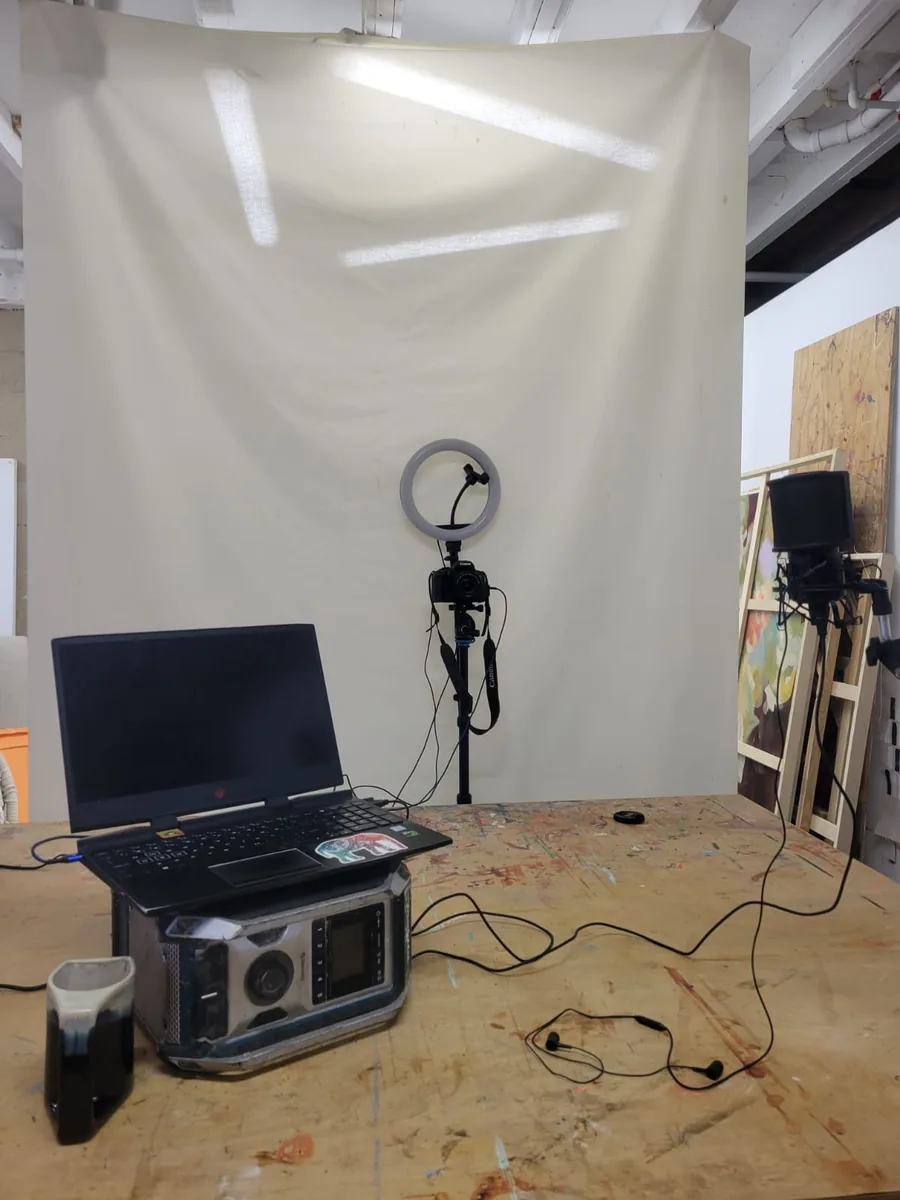
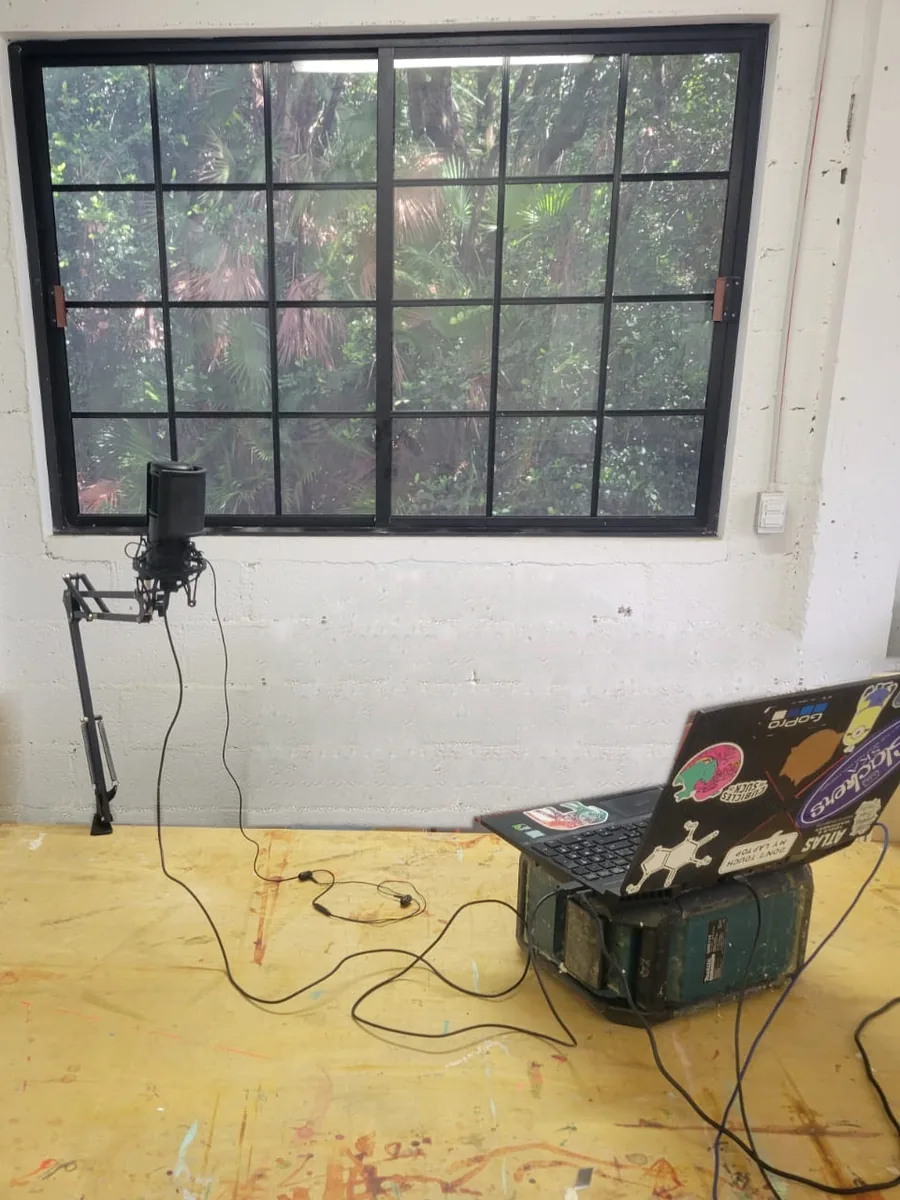
- Sound: a USB microphone on an adjustable arm, set slightly off to the side, with wired earbuds plugged into the mic.
- Connection: a cable from your computer to your router, and nothing on Bluetooth.
- Video: a camera on a stand, running on wall power, with a light in front of you and your eyes on the lens.
- Room: the quietest place you have, with a background worth looking at.
- Backup: a plan for whatever is most likely to go wrong where you are.
Sound
Condenser or dynamic
Podcast microphones come in two main types.
- A condenser mic is more sensitive. It picks up more detail in your voice and more of the room around you, so it sounds best in a quiet room with soft things in it. Mine is a condenser.
- A dynamic mic is less sensitive. It mostly hears what's right in front of it, so it copes better with an echoey room or a noisy street, as long as you stay close to it.
If your room is quiet, either works. If it isn't, a dynamic mic is the safer choice.
USB is enough
There are more technical setups, with an XLR microphone and an audio interface between it and your computer. For guesting, I've found a USB mic perfectly good. Mine plugs straight into my laptop with a USB-C to USB cable, and the recording platform does the rest.
Put it on an arm
An adjustable arm holds the mic close to your mouth, where it sounds best, and keeps it off the desk, so it doesn't pick up every bump and tap. You can move it out of the way when you're done, too.
Set it off to the side
Never put the mic directly in front of your mouth. Ps and Bs push out a little burst of air, and a mic in its path turns it into a pop or a thump. Ss and Ts come out sharp and hissy (sound engineers call it sibilance), and they're harshest straight in front of you, too.
Set the mic slightly off to the side instead, pointing at the corner of your mouth rather than straight into it. The burst of air goes past it, the harsh edges of your consonants soften, and your voice still sounds full. Microphone makers give the same advice: Sennheiser's instructions for its studio mics say that if you hear sibilance, move the mic slightly to the side of your mouth.
Don't overdo it. Turn the mic too far away and your voice starts to sound thin. Record a sentence full of Ps and Ss ("Peter Piper picked a peck of pickled peppers" works) and listen back. A foam cover or a pop filter over the mic helps, too.
Wired earbuds, plugged into the mic
Headphones stop the host's voice coming out of your speakers and back into your mic as an echo. I use a set of corded earbuds that plug straight into the microphone, so I hear exactly what the mic hears. If I'm too far away, or rustling something, I know straight away.
Wired, not Bluetooth. Bluetooth adds a little lag, and a conversation recorded over the internet already has some. Put the two together and you start talking over each other.
Connection
If you can, plug your computer into your router with an ethernet cable. A wired connection is more reliable than any Wi-Fi, and it's the cheapest upgrade in this guide. If you can't, sit as close to the router as you can.
Video
More and more shows record video, for YouTube and for clips. If yours does, the camera and the light matter as much as the mic.
Use a real camera as your webcam
I use a Canon EOS Rebel T8i as my webcam, connected to my laptop with a USB to micro USB cable. It shoots 1080p and 4K video, and it looks far better than a laptop's built-in camera. If you don't have a camera, a recent phone on a stand is still a step up from most laptops.
I use the lens that came with it. Other lenses zoom in tighter, which makes it harder to frame yourself at a desk. The camera sits on a stand, so I can put it exactly where I want it.
Run it on wall power
A camera battery isn't made for long conversations. Recording in 4K, even as a webcam, mine lasts about 40 minutes, which is never enough. So I use a dummy battery: it sits in the battery slot and plugs into the wall, and the camera runs for as long as the conversation does. Provided there isn't a Belizean power outage, anyway (more on that below).
Light your face
Put your main light in front of you, behind the camera. Mine is a ring light, with the camera mounted in the middle of it. My background is a bright window, so the light in front of me matters even more: with daylight behind you and nothing in front, a camera turns you into a silhouette.
If the light where you want to record isn't good, use three-point lighting:
- a key light in front of you and a little to one side, your main light;
- a softer fill light on the other side, to soften the shadows the key light makes;
- a back light behind you, to separate you from the background.
Choose your background
What's behind you is part of the picture. Mine is the empty lot to the north, through a big window: palms and trees, and nothing to tidy.
If you don't have a view, use a green screen, put up a display behind you, or build a small set: a shelf, a plant, a few things that say what you do. Whatever is in the frame, keep it tidy.
Look into the lens
It's always odd to watch someone being interviewed who keeps looking up, down or off to the side. So I set my laptop up off to the side, out of the shot, and I've trained myself to listen and look into the camera.
While we're recording, I don't actually see the host. I find screens distracting, so I fold the camera's flip-out screen away and tilt my laptop's lid down until I can't see it. I hear everything through my earbuds, and I treat the lens like an eye and talk to it.
It takes some getting used to, but it works. You look like you're talking to the person watching, which comes across as real presence on camera, and there's nothing on a screen to pull your attention away. If you'd rather see the host, put their video right under the camera, so your eyes stay close to the lens.
The room
Most recording platforms now remove background noise, but it's always best to start with as little as possible. Set up in the quietest place you have. Soft things in the room (a sofa, curtains, a bookshelf) cut echo. Close the door, and silence anything that might ping.
Recording platforms
The host picks the platform, so you'll see a few. Riverside is the best I've used. It records each person on their own computer and uploads it as you go, so a wobbly connection doesn't spoil the recording. When you finish, leave the tab open until it says your upload is done. Zoom, StreamYard and Google Meet are all fine.
Have a plan for what goes wrong
Every setup has a weak point. Mine is the power. Outages here haven't been too bad recently, but they can be pretty regular at times, especially in July and August, when it's really hot.
If I'm worried about the power, I run the whole setup, router included, from a portable solar generator on full charge. If the power goes, all I lose is the room's lights, which are wired into the house.
Usually, though, I just tell the host before we start: if I go black, hang tight, and I'll be back online quickly. Outages here tend to be a blip, a minute or two at most. A host who knows what's going on can wait or keep talking, and nobody panics.
Whatever your weak point is (a patchy connection, building work next door, a dog that hates the doorbell), tell the host before you start.
Before every recording
- Camera on wall power, framed at eye level.
- Light on, in front of you.
- Laptop off to the side, its screen out of your eyeline.
- Mic on, close to your mouth and slightly off to the side, with your earbuds plugged into it.
- Bluetooth off, ethernet in.
- Door shut, notifications off, phone on silent.
- Record a few seconds and play it back.
Next: what you say
A good setup gets you heard. What you say is the rest of it: see how to be a great podcast guest. And before a host books you, they'll look you up, so it helps to have a page made for hosts.
Finding the shows
A good setup is worth more on shows that fit you. CastGhost reads each show's recent episodes, finds how to reach the host, and drafts a pitch from your own material for you to send from your own Gmail.
Setting up your profile and finding shows that fit you are free. You pay $2 when a pitch is drafted. See Pricing.